Create a Modern Application with Inspira and Vue
The following is a step-by-step walkthrough of how to set up a basic app with Vue and Inspira.
Getting Started
Let's get started! Follow these steps to install Inspira and set up the project directories:
$ mkdir inspira-and-vuejs
$ cd inspira-and-vuejs
$ mkdir backend
$ cd backend
$ python -m venv .venv
$ source .venv/bin/activate
$ pip install inspira
$ inspira init
$ inspira new database --name mydb --type sqlite
File Generation
Execute the following commands to generate controller, repository, model, and service files:
$ inspira new controller user
$ inspira new repository user
$ inspira new service user
$ inspira new model user
Model
Open the user.py model file and make the following changes
from sqlalchemy import Column, Integer, String
from database import Base


class User(Base):
    __tablename__ = "users"
    id = Column(Integer, primary_key=True)
    name = Column(String(255), nullable=False)
    email = Column(String(255), unique=True, nullable=False)
    address = Column(String(255), nullable=True)
Repository
Open the user_repository.py file and make the following changes:
from database import db_session
from inspira.logging import log
from sqlalchemy.exc import SQLAlchemyError

from src.model.user import User


class UserRepository:

    def get_all_users(self):
        return db_session.query(User).all()

    def get_user_by_email(self, email: str) -> User:
        return db_session.query(User).filter_by(email=email).first()

    def create_user(self, user: User) -> bool:
        try:
            db_session.add(user)
            db_session.commit()
            return True
        except SQLAlchemyError as e:
            db_session.rollback()
            log.error(f"Error creating user: {e}")
            return False
This class handles database operations for users, making it easy to work with user data. It includes the following methods:
get_all_users(self): Retrieves all users from the database.
get_user_by_email(self, email: str) -> User: Finds a user in the database based on their email address.
create_user(self, user: User) -> bool: Adds a new user to the database.
Service
Now, in the user_service.py file, add the following:
from src.model.user import User
from src.repository.user_repository import UserRepository

from src.serializers.user_serializer import UserSerializer


class UserService:
    def __init__(self, user_repository: UserRepository, serializer: UserSerializer):
        self._user_repository = user_repository
        self._serializer = serializer

    def get_all_users(self):
        users = self._user_repository.get_all_users()
        serialized_users = [self._serializer.user_all_fields(user) for user in users]

        return serialized_users

    def get_user_by_email(self, email: str) -> User:
        return self._user_repository.get_user_by_email(email)

    def create_user(self, name: str, email: str, address: str) -> bool:
        new_user = User()
        new_user.name = name
        new_user.email = email
        new_user.address = address

        return self._user_repository.create_user(new_user)
The UserService class offers a simplified interface for handling User-related tasks.
It interacts with the UserRepository for database operations and utilizes the UserSerializer for data serialization.
This class includes the following methods:
get_all_users(self): Retrieves all users from the database using the associated UserRepository.
get_user_by_email(self, email: str) -> User: Retrieves a specific user from the database based on the provided email using the associated UserRepository.
create_user(self, name: str, email: str, address: str) -> bool: Creates a new user with the given name, email, and address, and delegates the storage operation to the UserRepository.
The UserService acts as a bridge between the application logic and the database, providing a streamlined approach to User management.
Controller
Now, in the user_controller.py file, add the following:
from inspira.decorators.http_methods import get, post
from inspira.decorators.path import path
from inspira.responses import JsonResponse
from inspira.requests import Request

from src.service.user_service import UserService


@path("/users")
class UserController:
    def __init__(self, user_service: UserService):
        self._user_service = user_service

    @get()
    async def index(self, request: Request):
        users = self._user_service.get_all_users()

        context = {
            "users": users
        }

        return JsonResponse(context)

    @post()
    async def create_user(self, request: Request):
        body = await request.json()
        name = body["name"]
        email = body["email"]
        address = body["address"]

        self._user_service.create_user(name, email, address)
        return JsonResponse({"message": "Successful"})
The UserController class acts as a web controller, managing HTTP requests related to user operations.
It's decorated with @path("/users"), indicating the base path for its endpoints.
This controller depends on a UserService instance for handling user-related actions.
index(self, request: Request): Handles HTTP GET requests to retrieve all users. It calls the get_all_users method of the associated UserService, then returns a JsonResponse containing the user data.
create_user(self, request: Request): Manages HTTP POST requests for creating a new user. It extracts the name, email, and address from the request body, then delegates the creation to the create_user method of the UserService.
In essence, the UserController facilitates communication between the web interface and the application logic provided by the UserService, ensuring smooth handling of user-related actions through specified HTTP methods.
User Serializer Module
Create a new file called user_serializer.py within the serializers module and include the following content:
from src.model.user import User


class UserSerializer:

    def user_all_fields(self, user: User):
        return {
            "id": user.id,
            "name": user.name,
            "email": user.email,
            "address": user.address
        }
Within this module, the UserSerializer class offers a method for serializing user objects.
The user_all_fields method handles the serialization of all available fields into a dictionary format.
Main.py
Open main.py and modify it to look like following:
from inspira import Inspira
from inspira.middlewares.cors import CORSMiddleware

origins = ["http://localhost:5173"]

app = Inspira(secret_key="SM3XuO4DOdk0PG5a_Qt4wkHZtKxbaA2yUxjPxJZ18nkBHFAULd")

cors = CORSMiddleware(origins)
app.add_middleware(cors)
In this modification, CORSMiddleware has been added to handle Cross-Origin Resource Sharing (CORS) for the specified origins.
Migrations
To initiate the creation of the user table, execute the following command to generate a migration file:
$ inspira new migration create_table_users
This command will create the migration file in the migrations folder.
Open the file and make the necessary modifications as shown below:
-- Up
CREATE TABLE users (
    id INTEGER NOT NULL,
    name VARCHAR(255) NOT NULL,
    email VARCHAR(255) NOT NULL,
    address VARCHAR(255) NULL,
    PRIMARY KEY (id),
    UNIQUE (email)
);
-- Down
DROP TABLE users;
Now run the following command to apply the migration:
$ inspira migrate
Starting the Server
After generating your app and setting up necessary resources, start the server with the following command:
$ uvicorn main:app --reload
The Client
To create a new Vue application in the root of the project alongside the backend directory, run the following command:
You'll be prompted to provide some information:
- Project name: Enter client.
- Select a framework: Choose Vue.
- Select a variant: Choose TypeScript.
$ npm create vite@latest
✔ Project name: … client
✔ Select a framework: › Vue
✔ Select a variant: › TypeScript
After creating the Vue application, install Axios and Bootstrap by running the following command:
$ npm i axios bootstrap@5.3.2
Next, create a file called axios.ts inside the src directory and add the following code to it:
import axios from "axios";

const axiosInstance = axios.create({
  baseURL: "http://localhost:8000/",
  headers: {
    accept: "application/json",
    "Content-Type": "application/json",
  },
});

export { axiosInstance };
Additionally, inside the src directory, create new directories and files:
$ mkdir src/composables
$ mkdir src/types
$ touch src/types/users.ts
$ touch src/composables/users.ts
These directories will be used for organizing your Vue application's code.
Add the following to src/types/users.ts:
export interface User {
  id: number;
  name: string;
  email: string;
  address: string;
}
Now, add the following to src/composables/users.ts:
import { Ref, ref } from "vue";
import { axiosInstance } from "../axios";

export default function useUsers() {
  const user: Ref<User> = ref<User>();
  const users: Ref<User[]> = ref<User[]>();

  async function getUserById(id: number) {
    const response = await axiosInstance.get(`/users/${id}`);
    user.value = response.data.user;
  }

  async function getUsers() {
    const response = await axiosInstance.get("/users");
    users.value = response.data.users;
  }

  async function createUser(name: string, email: string, address: string) {
    const body = {
      name: name,
      email: email,
      address: address,
    };
    await axiosInstance.post("/users", body);
  }

  return {
    user,
    users,
    getUsers,
    createUser,
    getUserById,
  };
}
In the src/types/users.ts file, we define an interface User representing the structure of a user object.
In the src/composables/users.ts file, we create a composition function useUsers that encapsulates user-related operations.
It utilizes Axios for making HTTP requests to the backend API. The composition function provides methods to fetch users, fetch a single user by ID, and create a new user.
Create a new file called Users.vue inside the components directory with the following code:
<template>
  <div class="bg-body-tertiary rounded-3 mt-5 p-3">
    <form @submit.prevent="onSubmit">
      <div class="mb-3">
        <label for="nameInput" class="form-label">Name</label>
        <input
          type="text"
          v-model="form.name"
          id="nameInput"
          class="form-control"
        />
      </div>

      <div class="mb-3">
        <label for="emailInput" class="form-label">Email address</label>
        <input
          type="email"
          v-model="form.email"
          id="emailInput"
          class="form-control"
        />
      </div>
      <div class="mb-3">
        <label for="addressInput" class="form-label">Address</label>
        <textarea
          v-model="form.address"
          id="addressInput"
          class="form-control"
        />
      </div>
      <button type="submit" class="btn btn-success">Submit</button>
    </form>
  </div>

  <table class="table mt-5">
    <thead>
      <tr>
        <th scope="col">#</th>
        <th scope="col">Name</th>
        <th scope="col">Email</th>
        <th scope="col">Address</th>
      </tr>
    </thead>
    <tbody>
      <tr v-for="user in users" :key="user.id">
        <th scope="row">{{ user.id }}</th>
        <td>{{ user.name }}</td>
        <td>{{ user.email }}</td>
        <td>{{ user.address }}</td>
      </tr>
    </tbody>
  </table>
</template>

<script lang="ts">
import { onMounted } from "vue";
import useUsers from "../composables/users";

export default {
  name: "Users",
  setup() {
    const { users, getUsers, createUser } = useUsers();
    const form = {
      name: "",
      email: "",
      address: "",
    };

    async function onSubmit() {
      await createUser(form.name, form.email, form.address).then(getUsers);
    }

    onMounted(getUsers);
    return {
      users,
      form,
      onSubmit,
    };
  },
};
</script>
This Vue component, Users.vue, includes a form for adding new users and a table to display existing users.
It utilizes the useUsers composable function to interact with the user-related functionality.
The form captures user input and calls the createUser function to add a new user.
The table dynamically renders the list of users fetched from the backend using the users data property.
Update App.vue to look like following:
<script setup lang="ts">
import Users from "./components/Users.vue";
</script>

<template>
  <Users />
</template>

<style scoped></style>
This modification sets up the App.vue file to import and use the Users component.
The template section simply includes the Users component, making it the main content of the app.
Starting the Server
To start the server, run the following command:
$ npm run dev
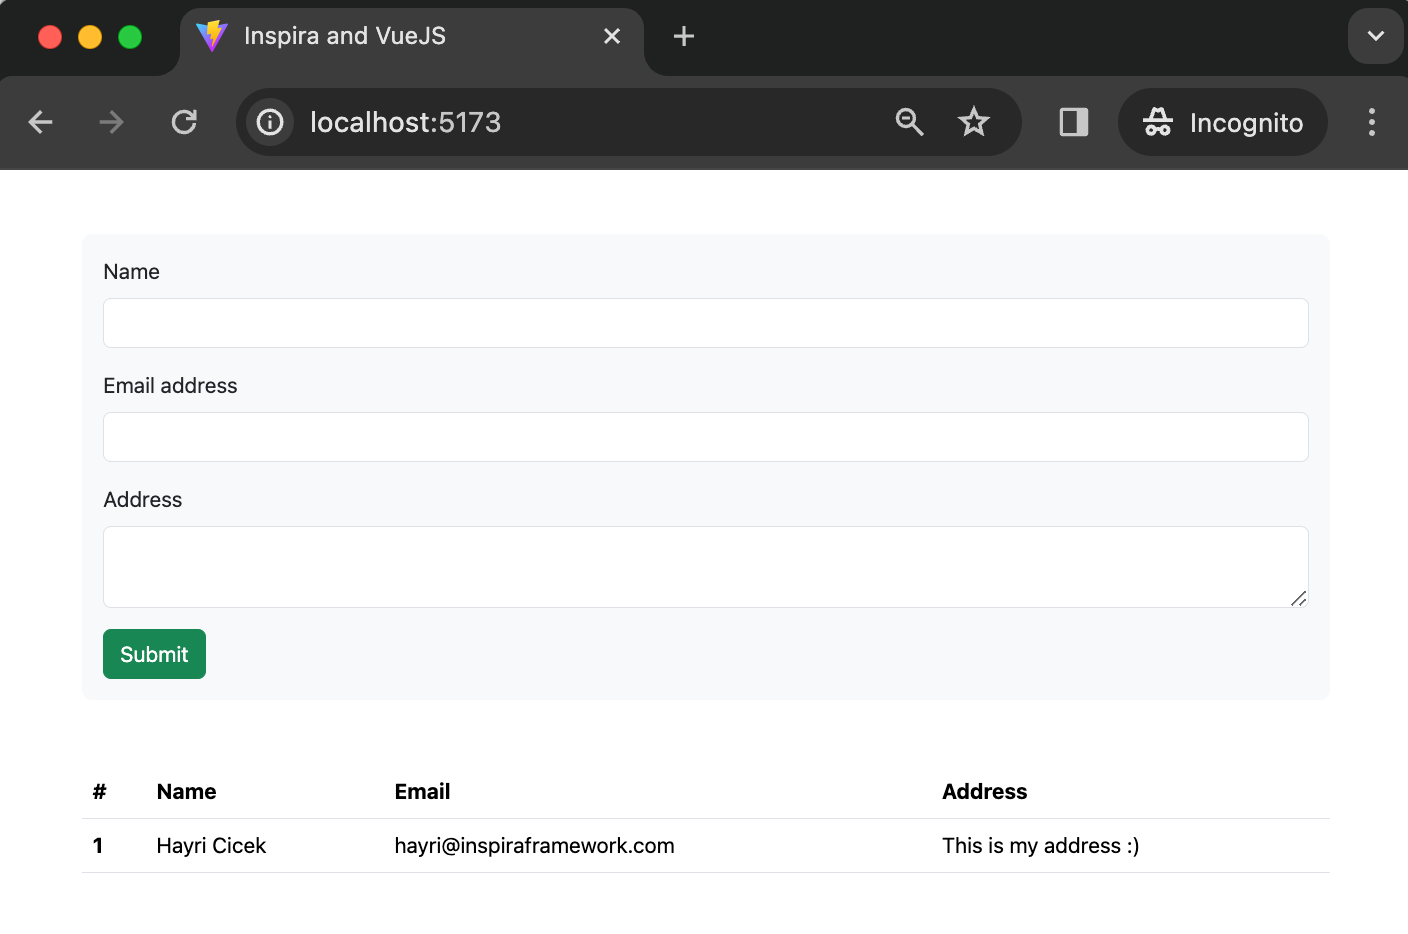
After starting the server, you can visit http://localhost:5173/ in your web browser to interact with the form.
Once the form is loaded, you can fill it out with the necessary information.
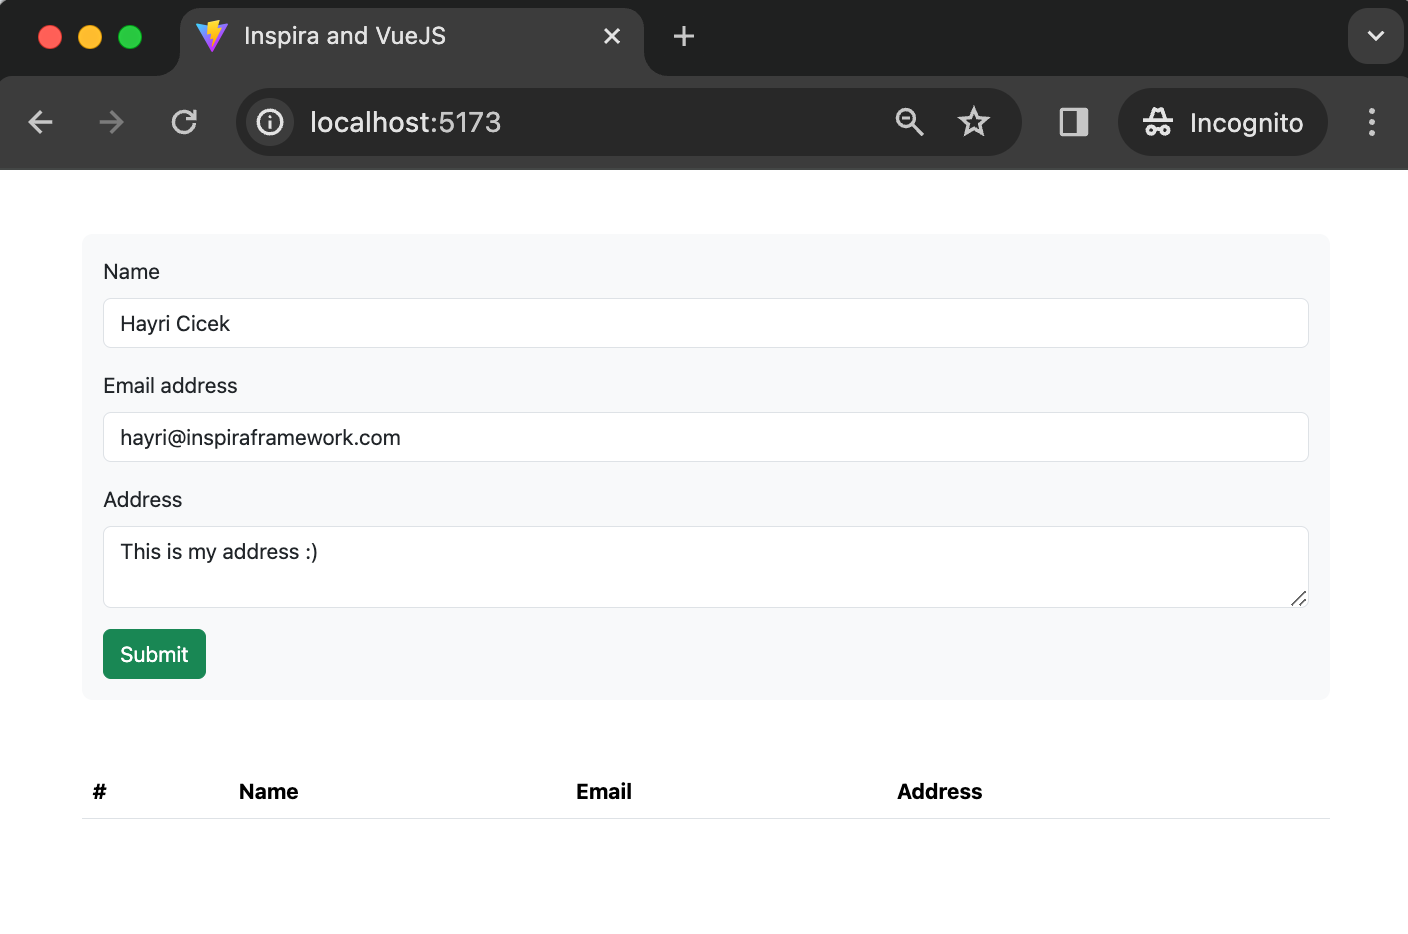
After submitting the form, you should see the result displayed.
Conclusion
In this tutorial, we've covered the process of developing a modern application with Inspira and Vue.
The code for this project is available on GitHub.
Happy coding!